Introduction
What is a Pwnagotchi
Pwnagotchi is an open-source project that combines a Raspberry Pi, an e-Paper display, and various scripts to create an autonomous Wi-Fi hacking device. It leverages artificial intelligence to learn from its environment, capture Wi-Fi handshakes, and grow more effective over time. As it "learns," your Pwnagotchi develops its own personality, interacting with you through its e-Paper display, making the experience both educational and entertaining.
How to build one
Hardware you need
- A Raspberry Pi Zero W(H) (Heart/Base)
- micro-SD card(min. 16GB, better more and min. 100 MB/s, better more)
- Micro-USB cable which can transfer data(very important)
- Pins (Pi with pre installed pins or solder them our self)
- Display (Waveshare V4)
- portable power source: Power Bank
For more in death explanation of the hardware, check out the Markdown guide
Building/Setup Tutorial
Assemble Pi and Display
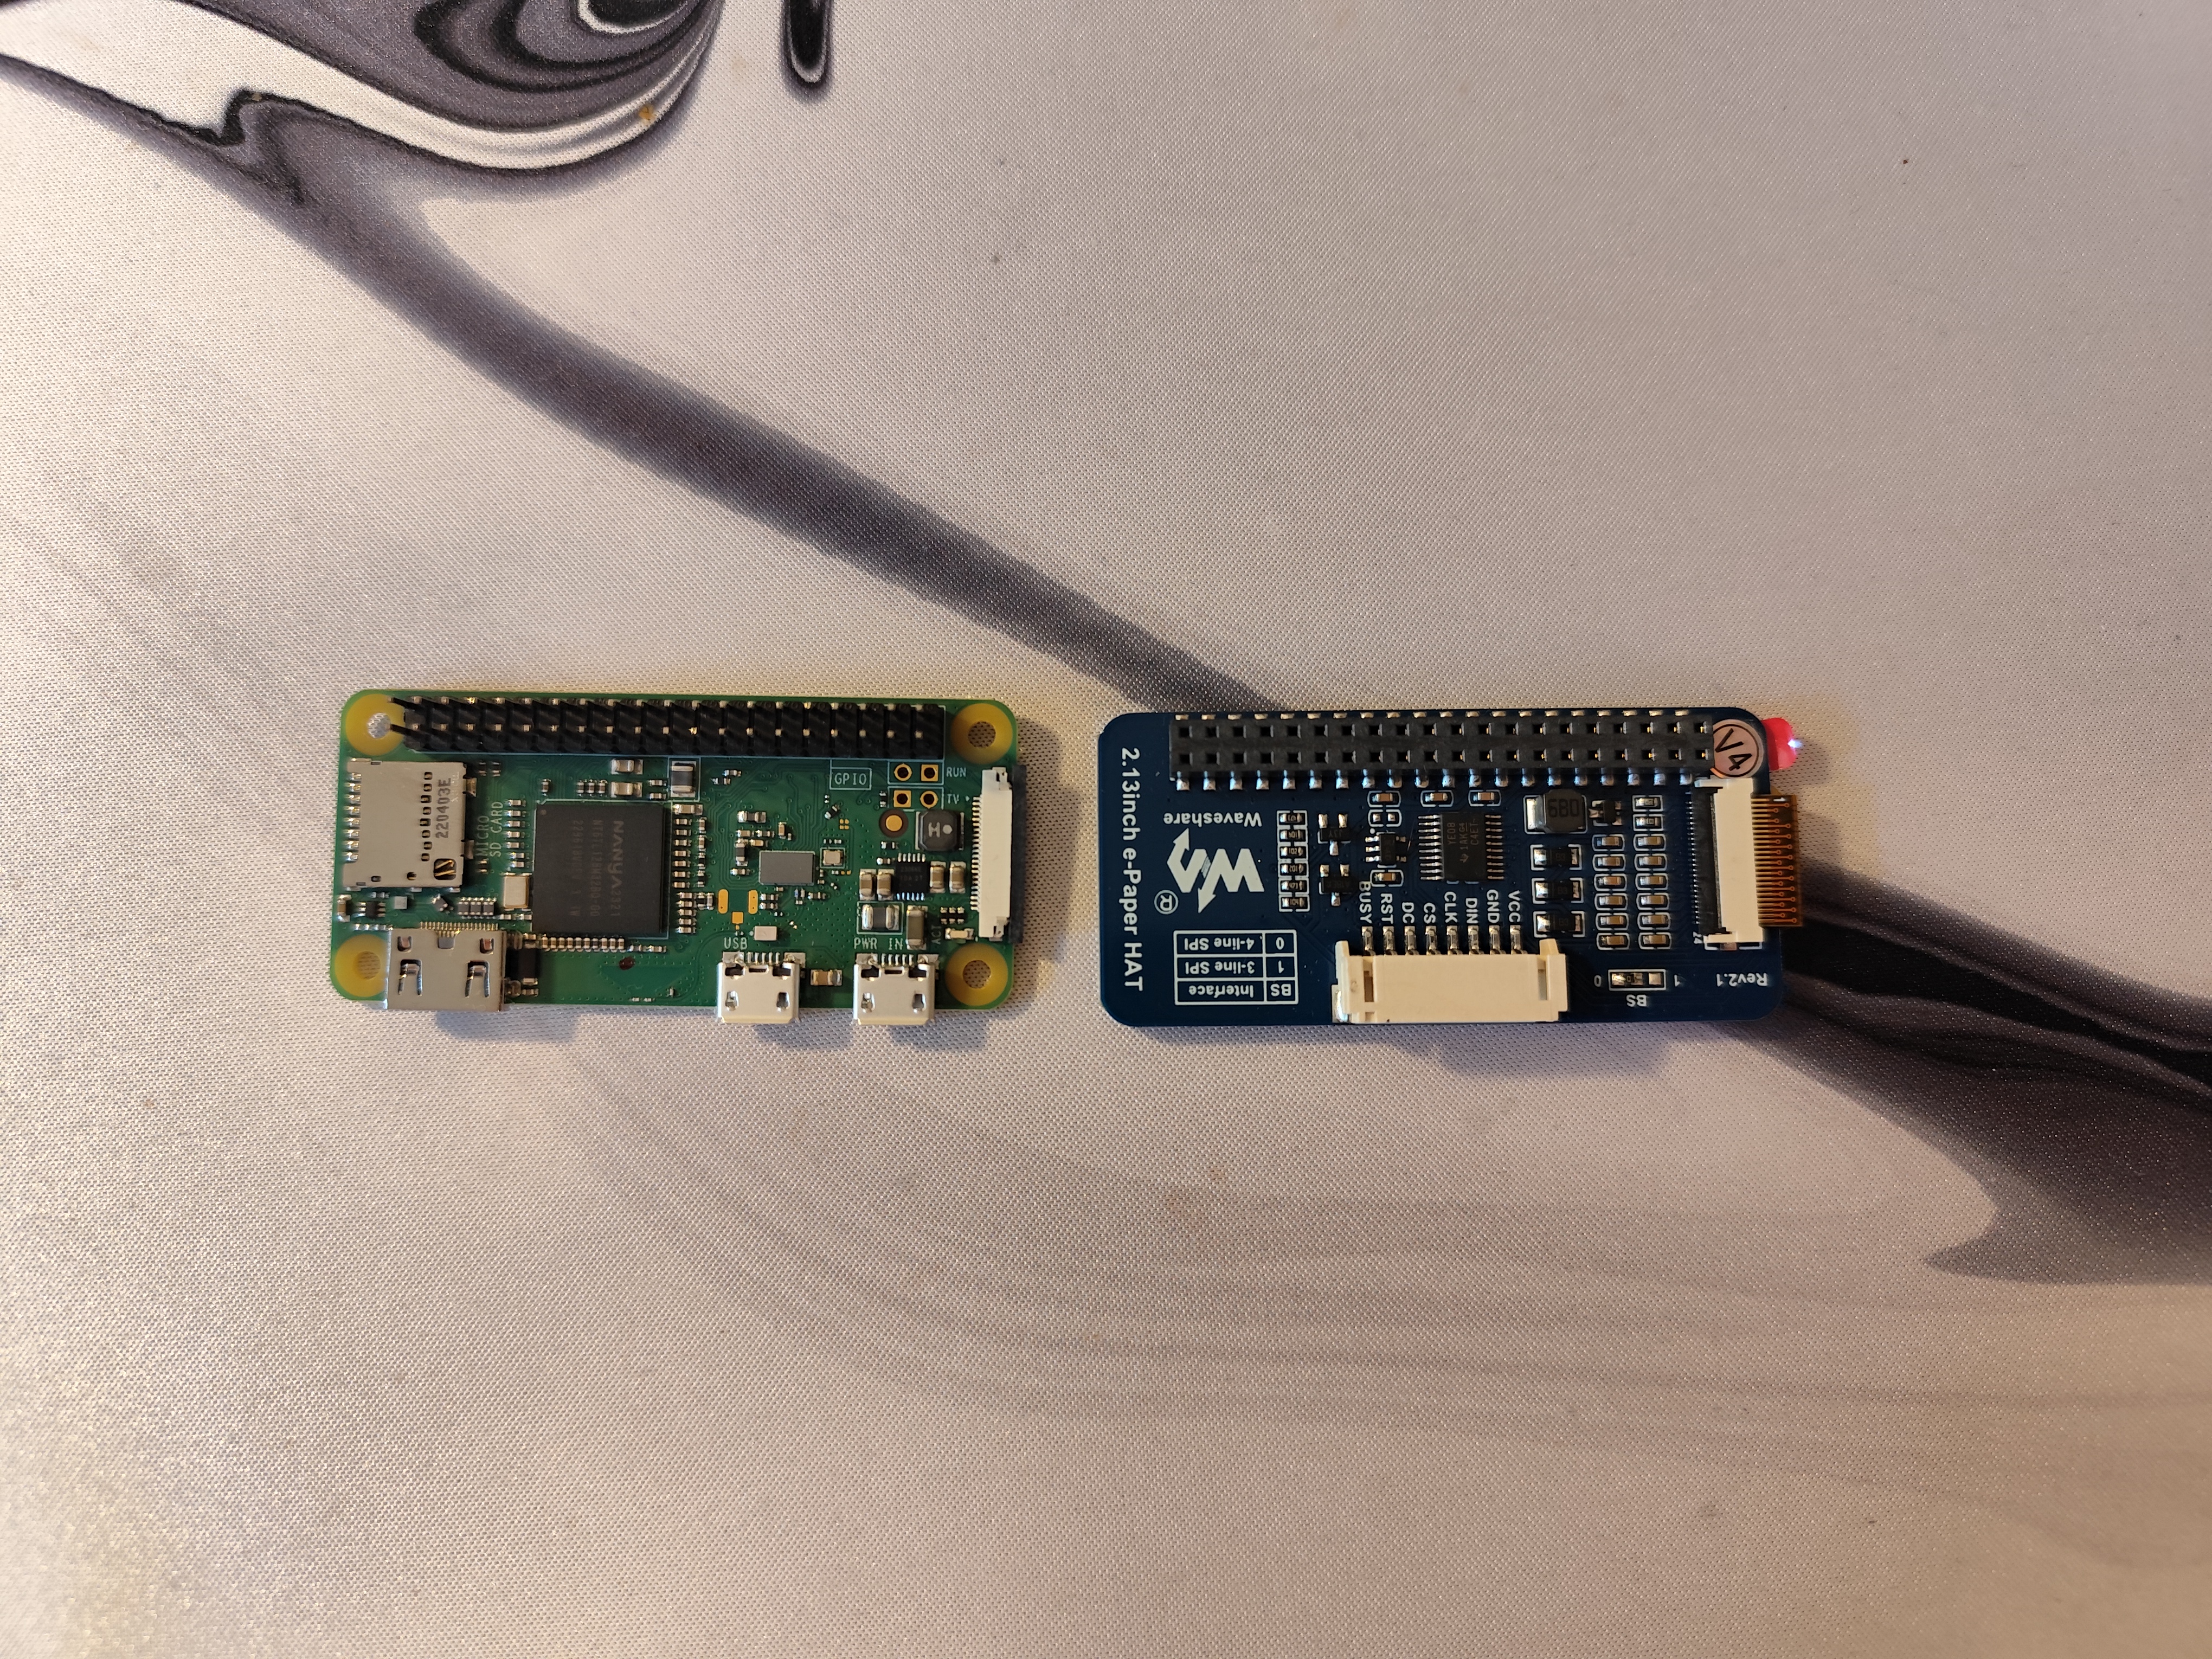
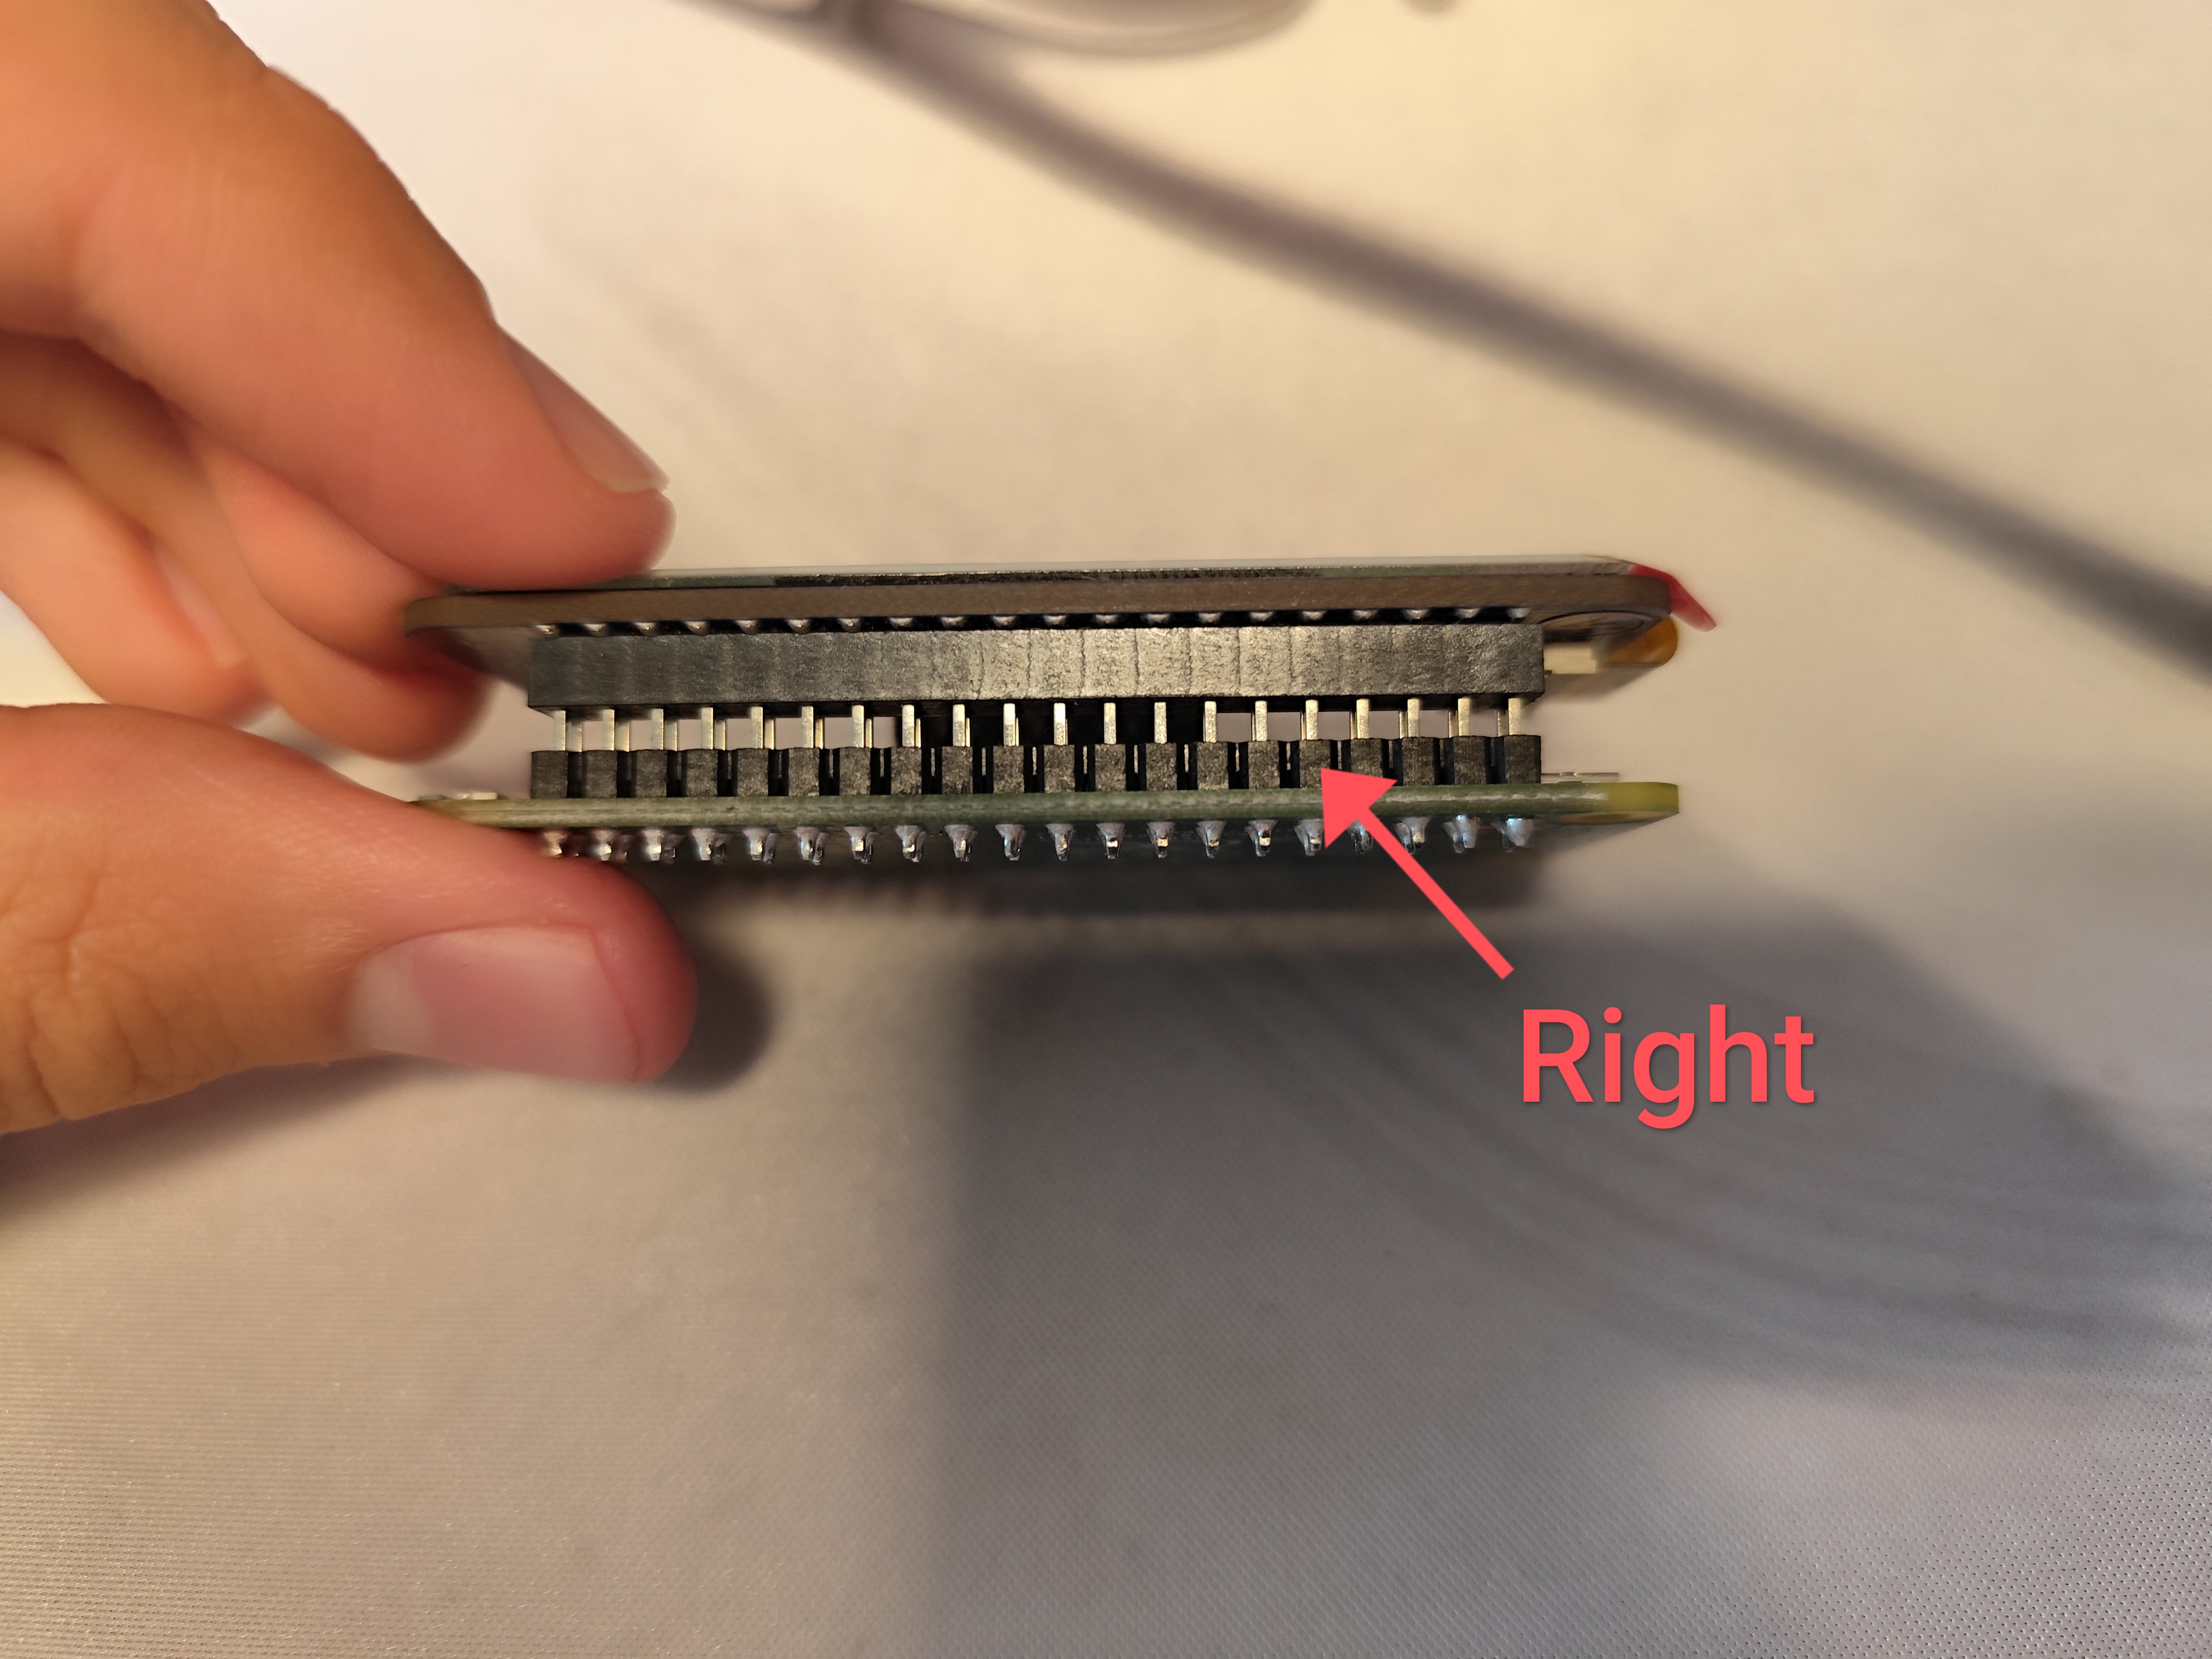
Now we have to connect them both. You see these "holes" on the display? These match perfectly with the pins on our Pi. Just stick them together.
Like this:
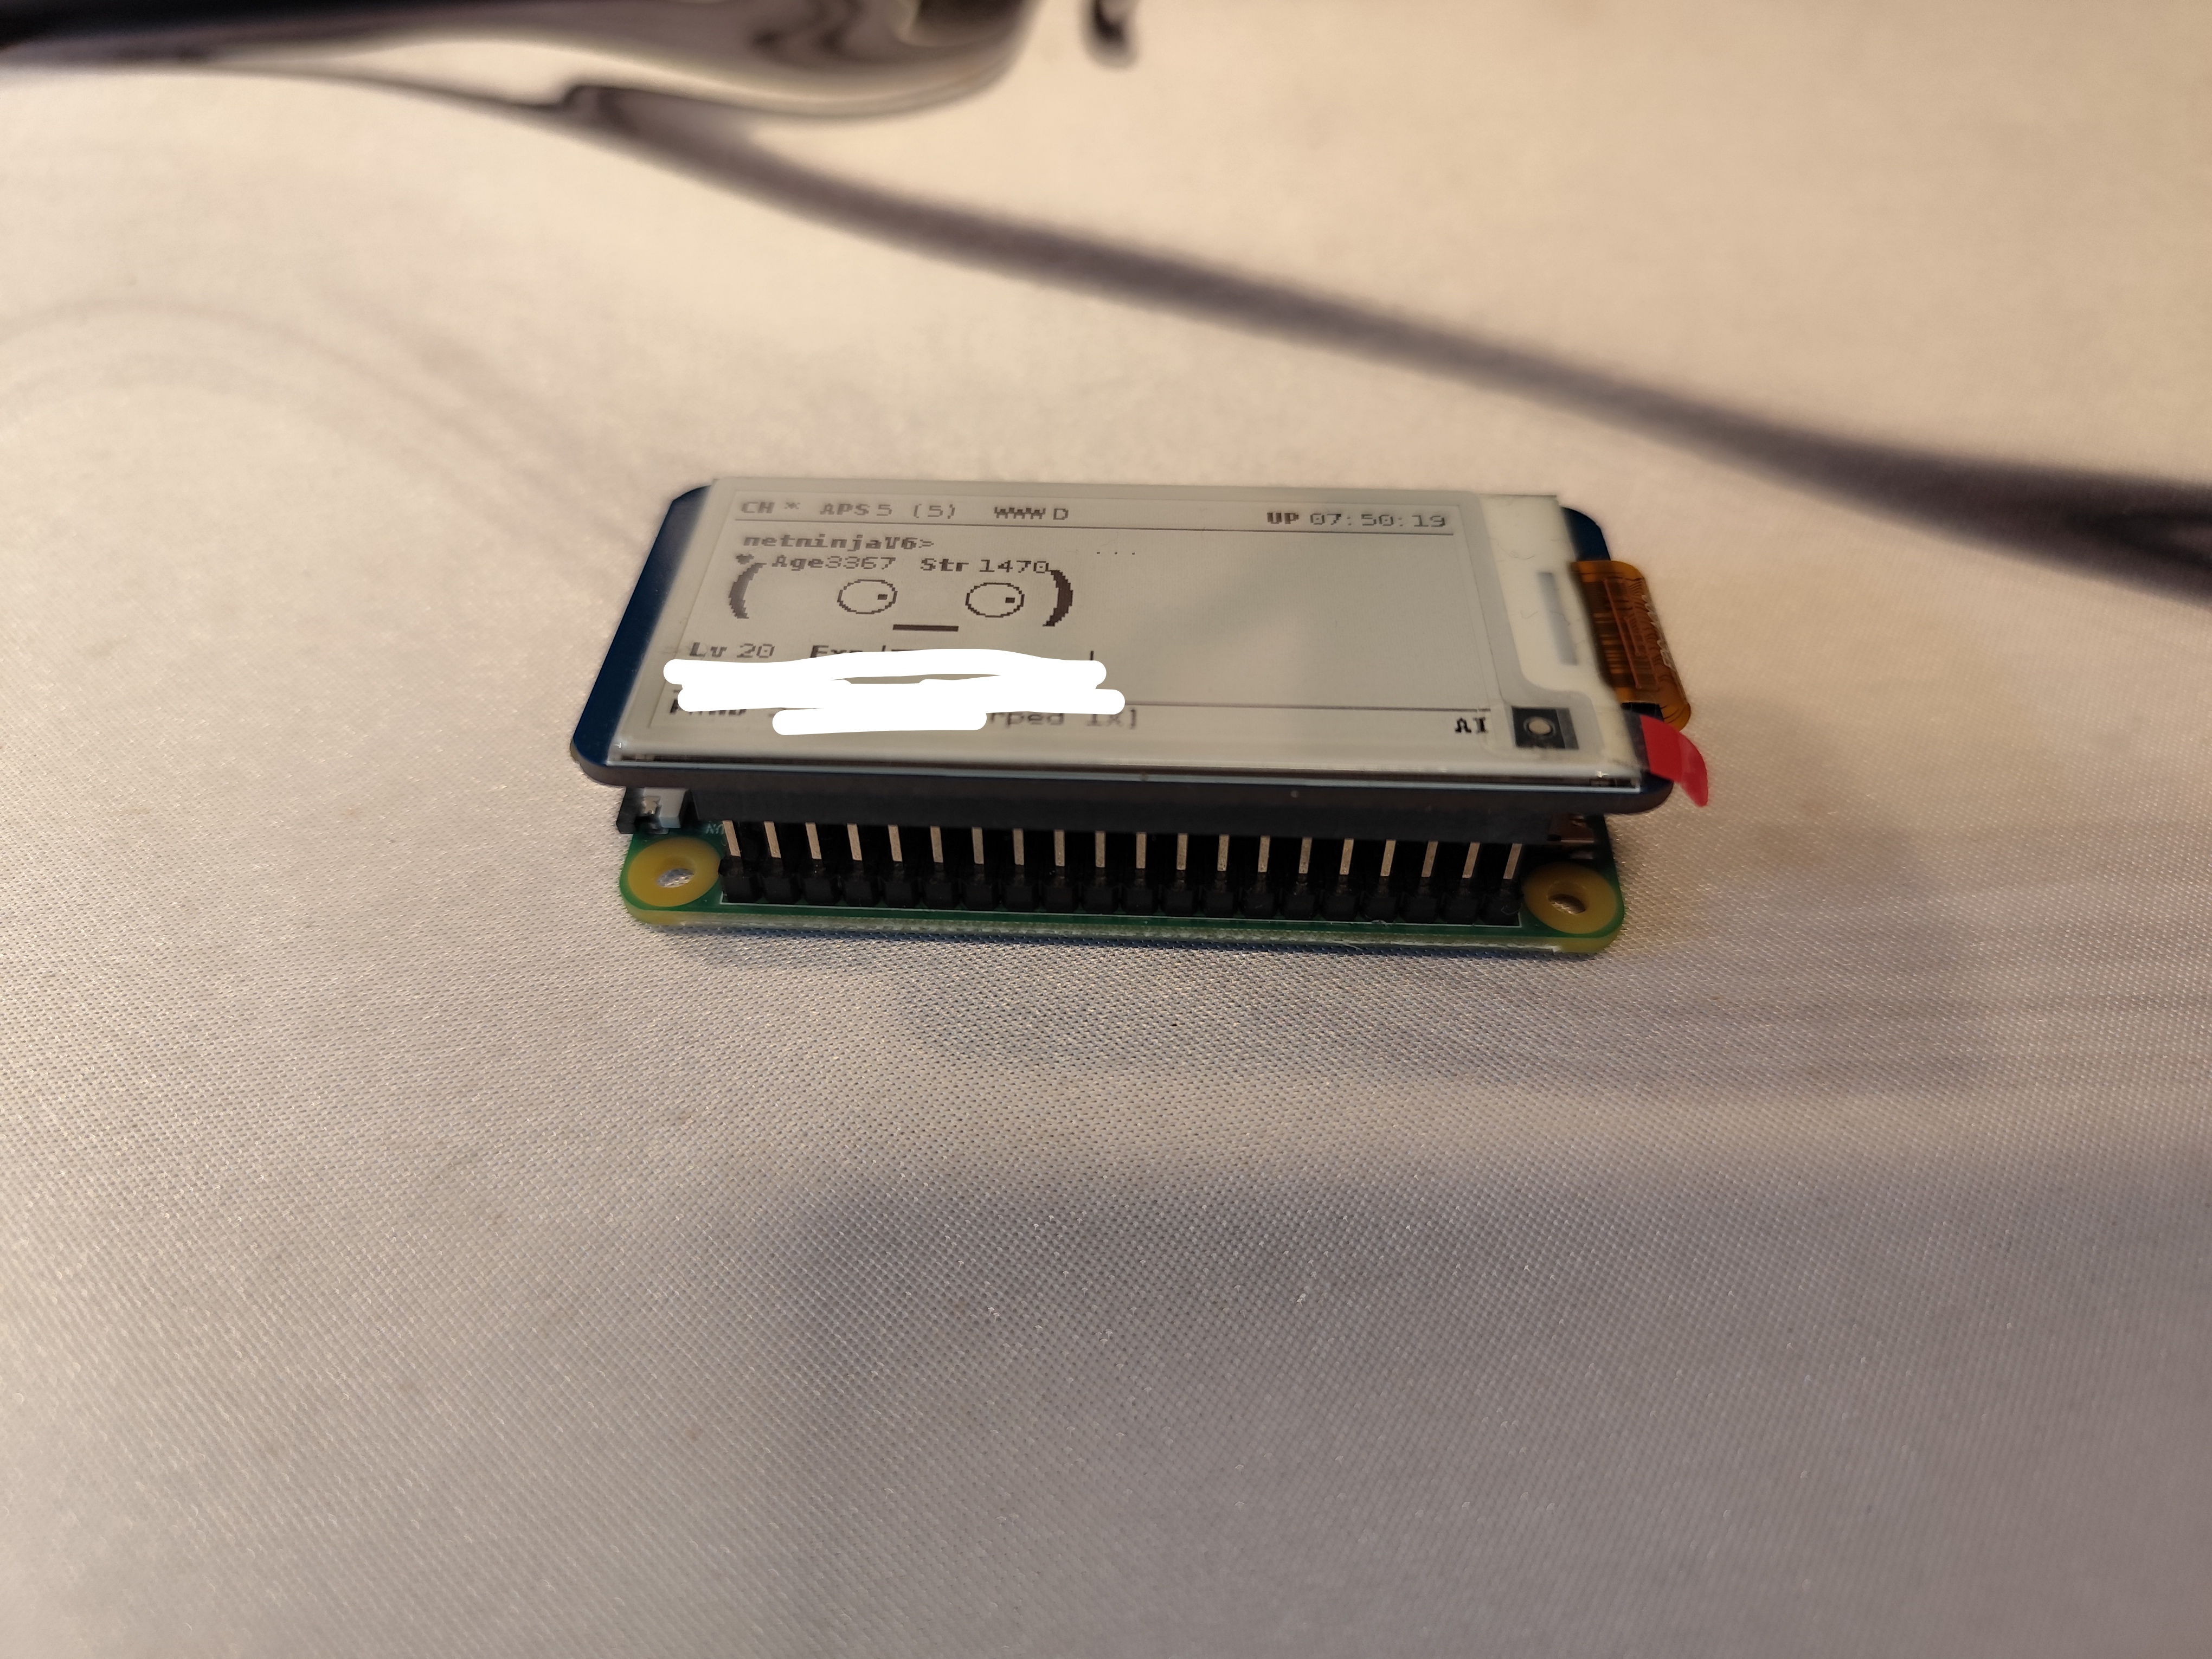
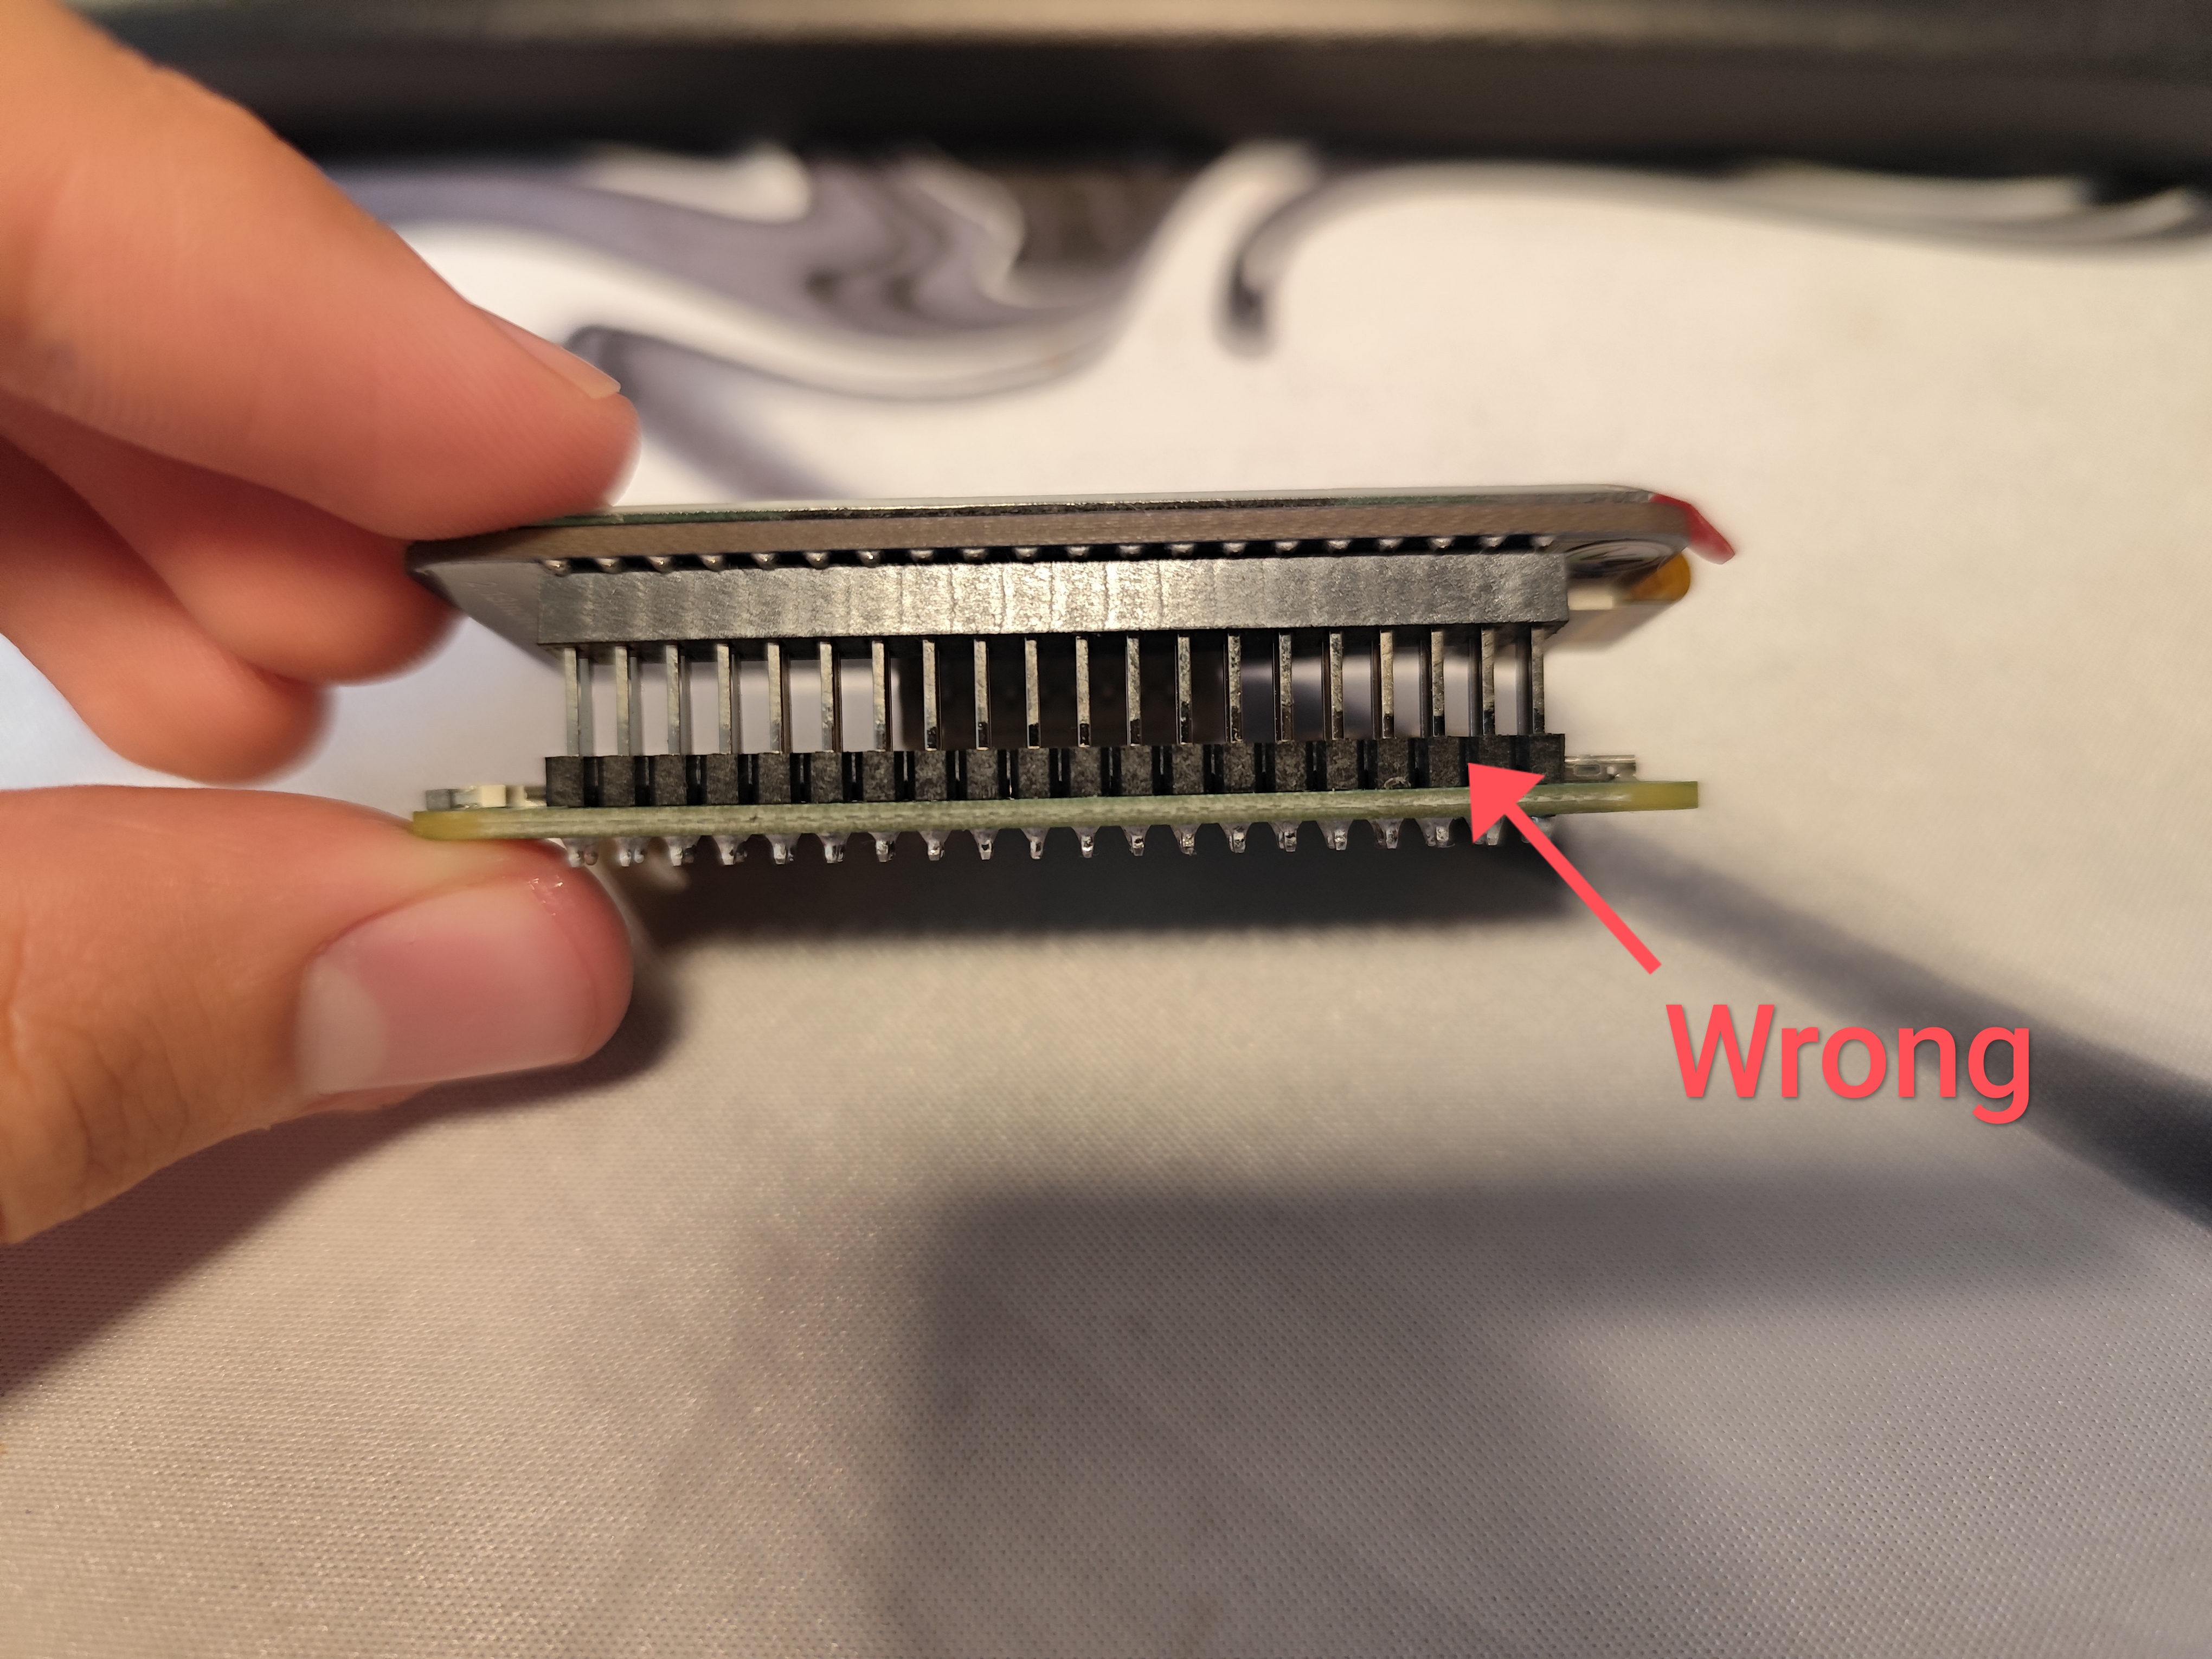
You need to push the display all the way down, even though it might feel wrong. It has to be fully connected; otherwise, you won't get a picture.
Like shown on following images:
Hardware-wise, you are finished.
Flashing the Image
What you need
Get the the latest image for your Pi here:
Latest Image
If you use a **Raspberry Pi Zero W(H)**, use the **32 bit** version. For **any other** mentioned above, use the **64 bit** version. To flash the image to the SD card, you need the . _Click_ "Choose OS," scroll all the way down, and select "Use Custom." Navigate to your Downloads folder and choose the downloaded image. In the final step, select your SD card and _click_ "Write". This may take a while, depending on your SD-card and reader.
First Boot
Starting Oi up
Insert your SD card into your Pi and grab your micro-USB cable. Your Pi has two USB ports, as shown in the image:
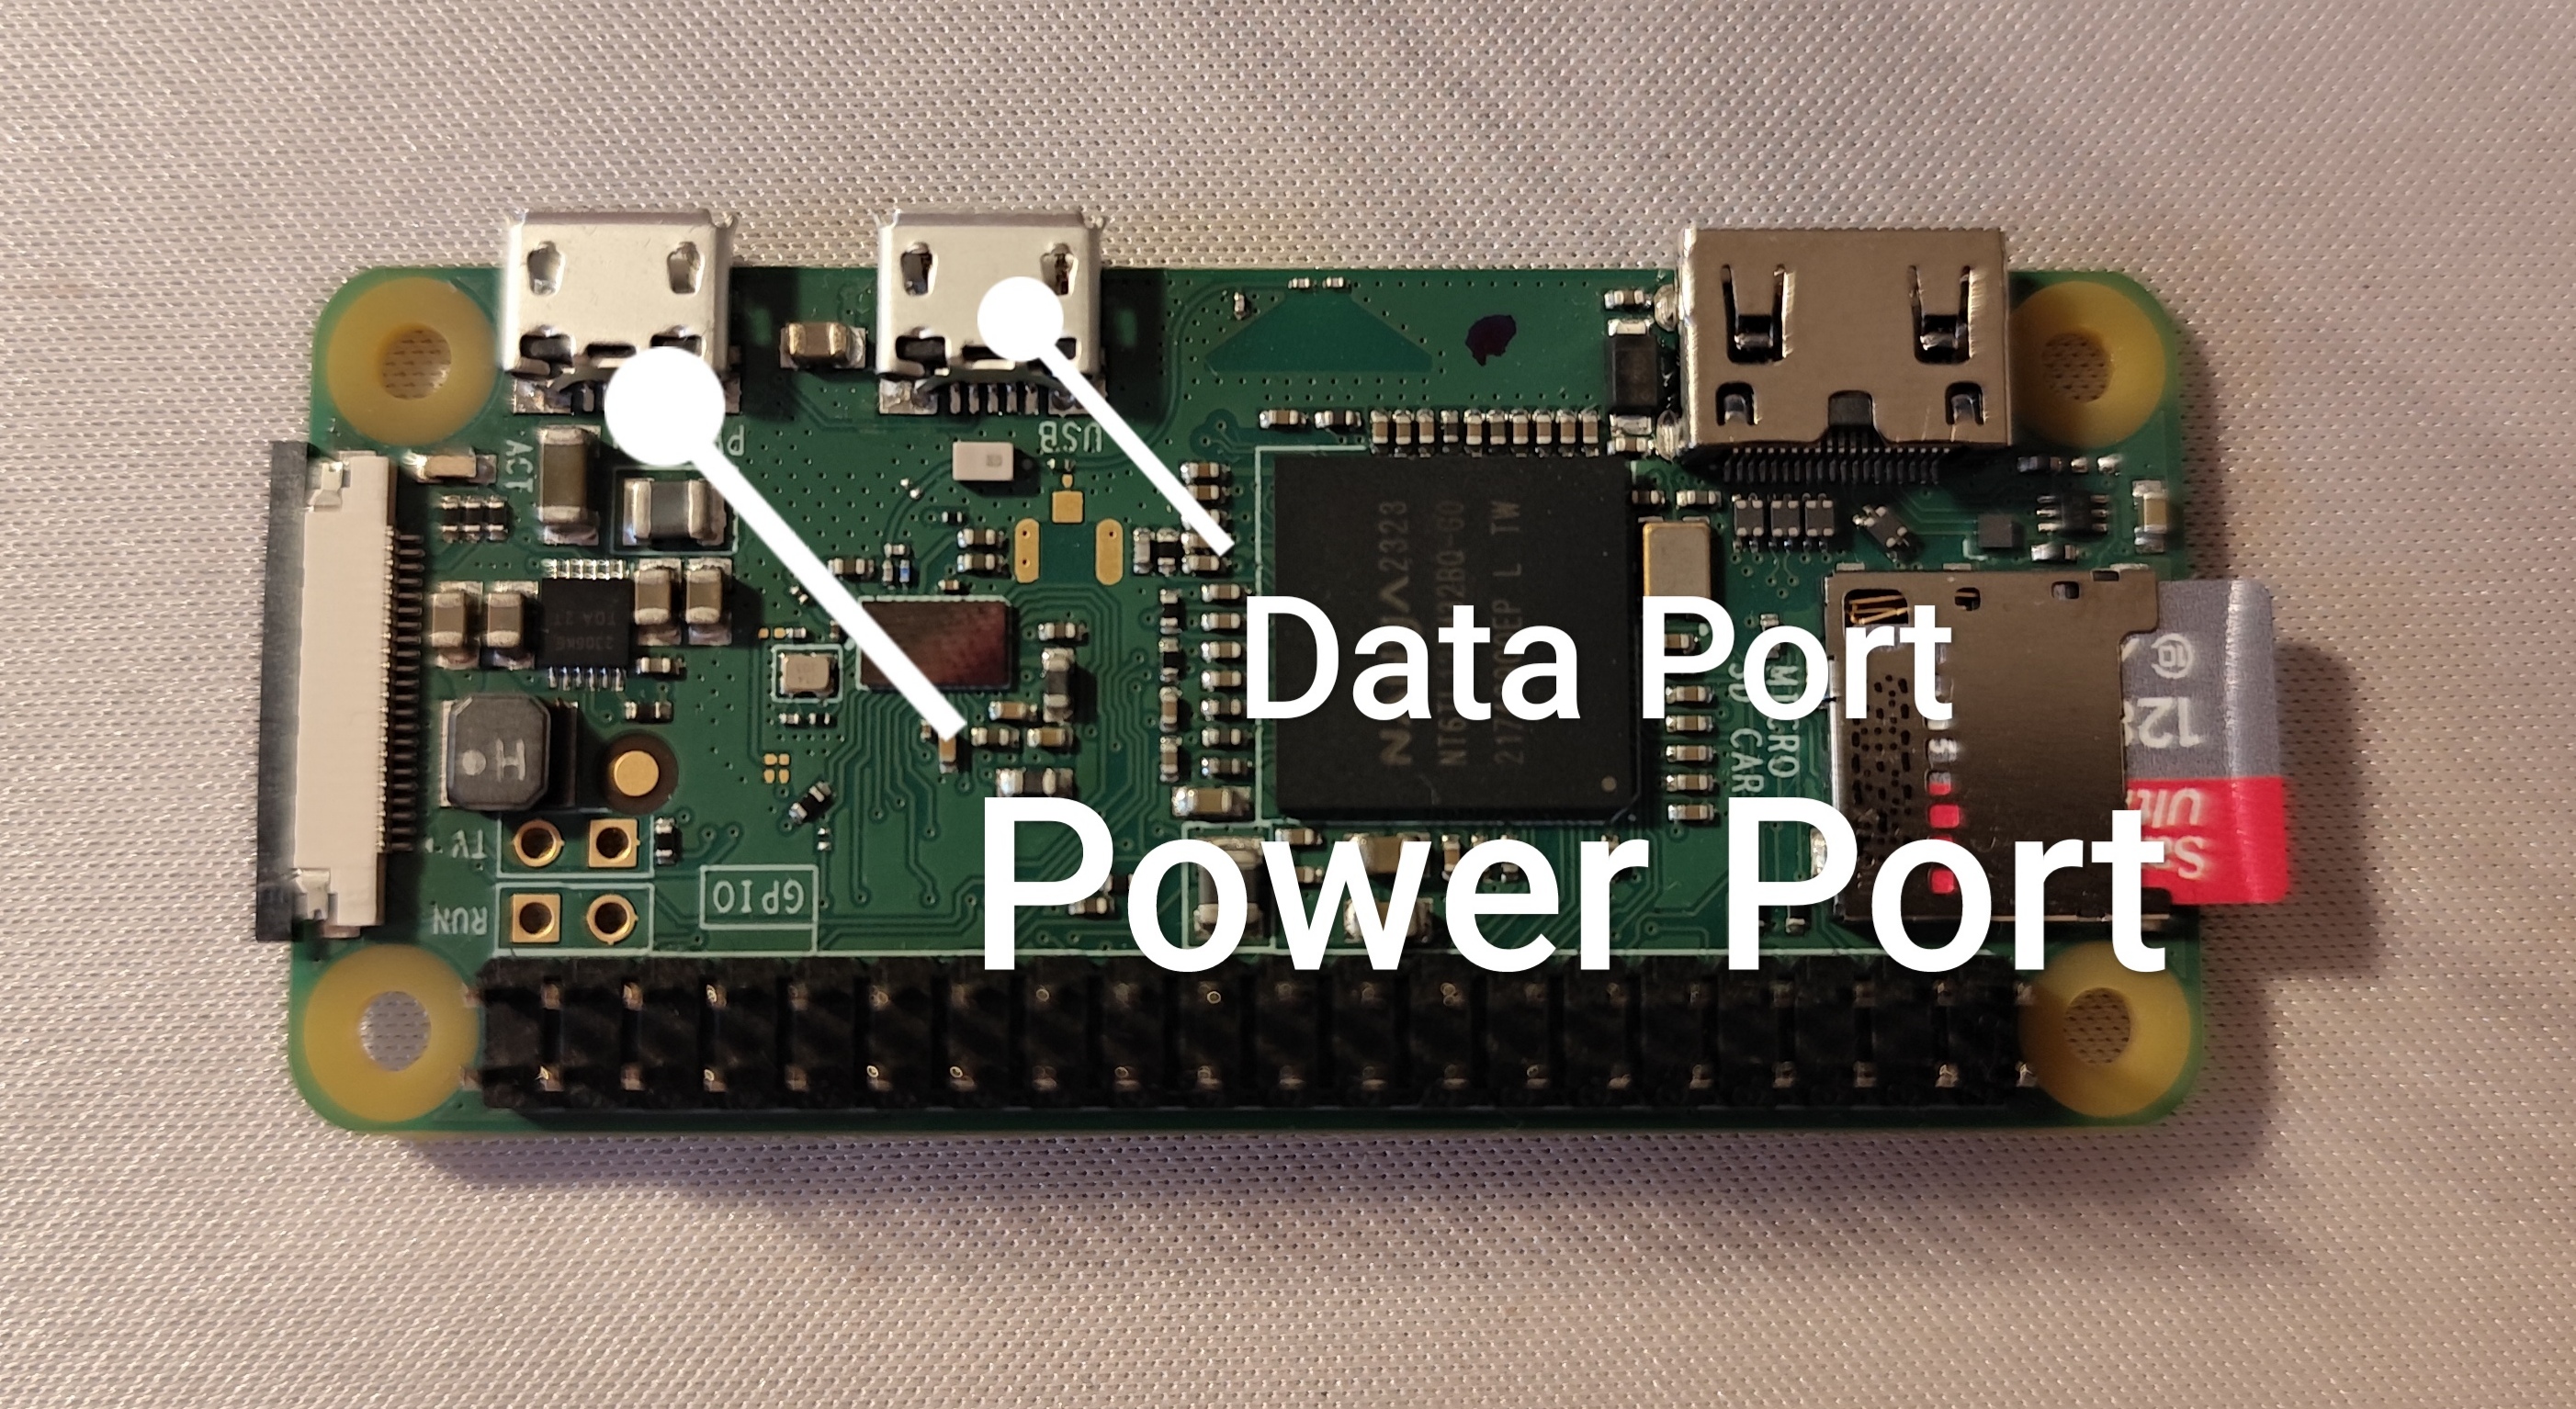
Connect your Pi through the Data Port with your PC.
Now wait!!! Don't touch your friend, don't disconnect him, just wait.
The first boot can take up to 25 minutes Go touch some grass and come back after a while.
Establishing Connection to Pi
Finsing the device
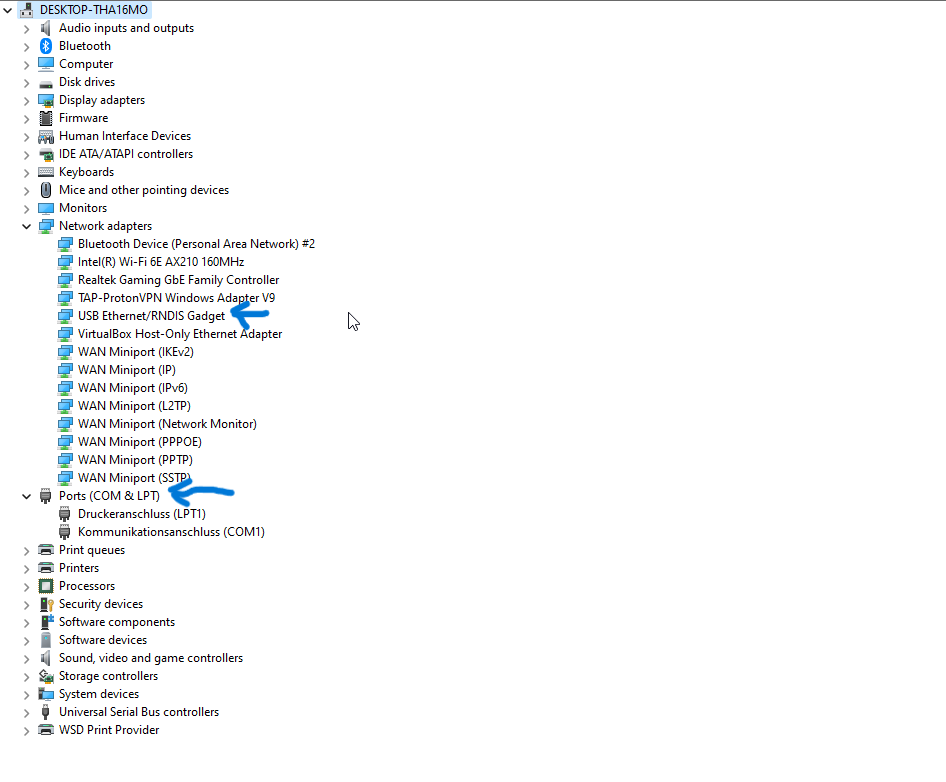
Open the "Device Manager" by searching for it in your taskbar. And open it.

After a while, either a "USB Ethernet/RNDIS" Gadget or a device under "Ports" should appear. If an RNDIS Gadget appears, you are good to go; otherwise, we will have to configure it to appear as one.
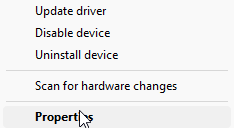
To make it into an RNDIS device, you will need to download the RNDIS drivers here Right-click the device and select "Properties."
Then click on "Driver" and select "Update Driver."
Click "Browse my computer for drivers."
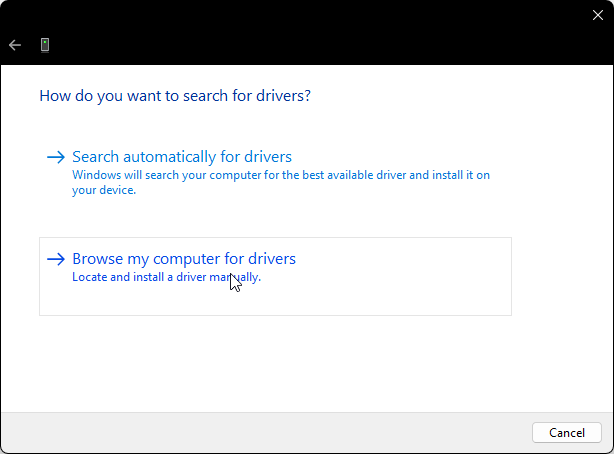
Navigate to your **unzipped** drivers folder, and then click "OK."
Your Pi should now be shown as "RNDIS Gadget".
Now you're good to go, and we can almost SSH into our Pi.
Configure Network Settings
To SSH into our Pi, we first need to configure the network settings of the Pi.
Open the settings on your PC and navigate to the "Network & internet" tab.
Next, click on "Advanced network settings".
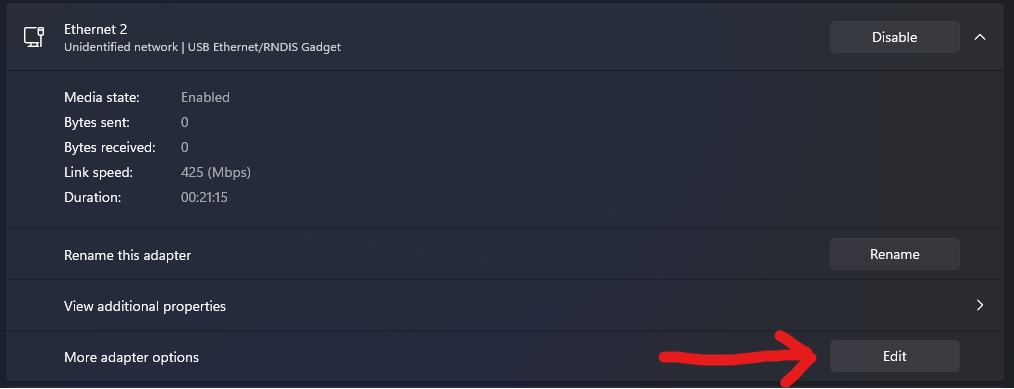
You should see your RNDIS Gadget there:
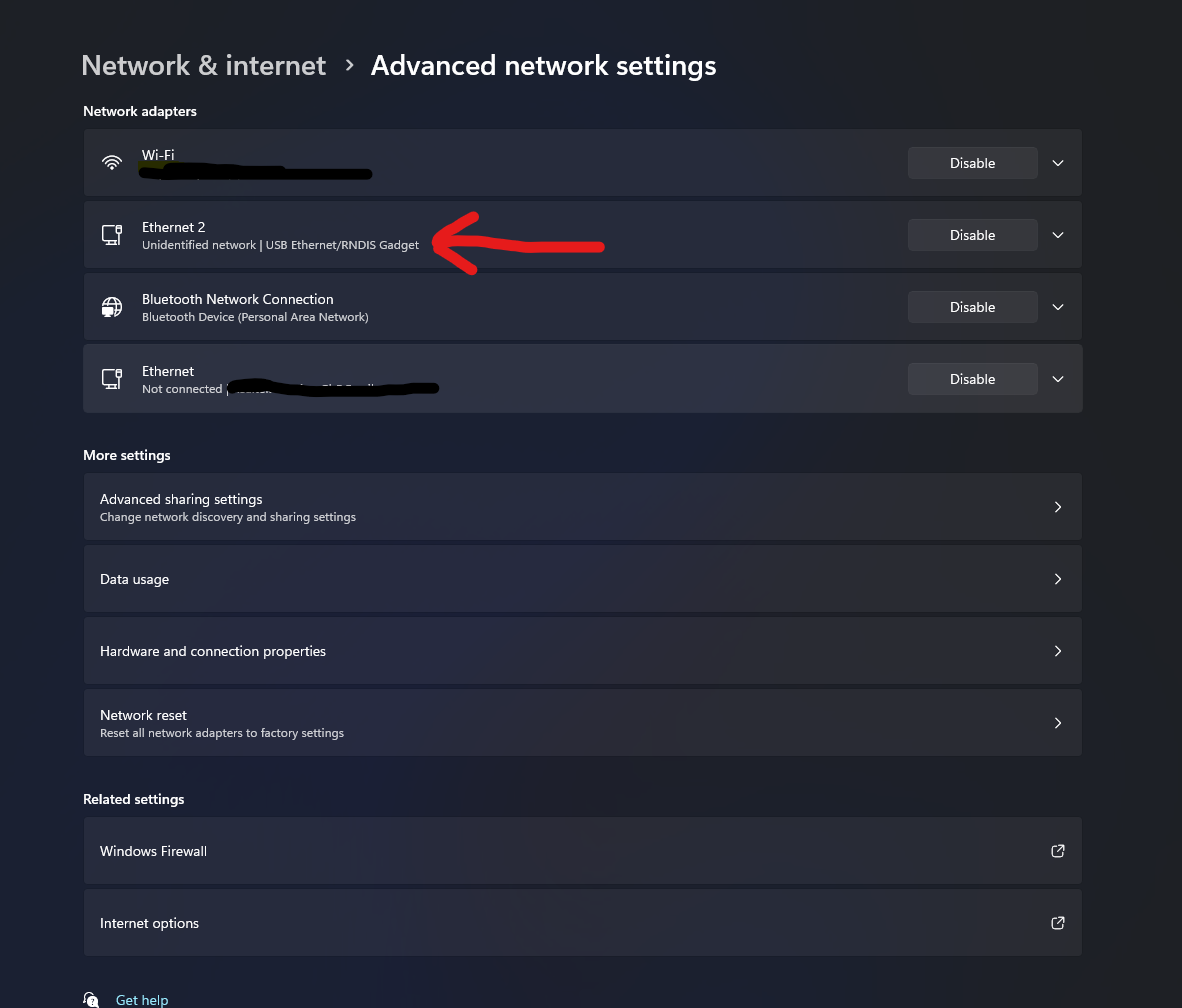
Expand the menu of your main network and click on "Edit".
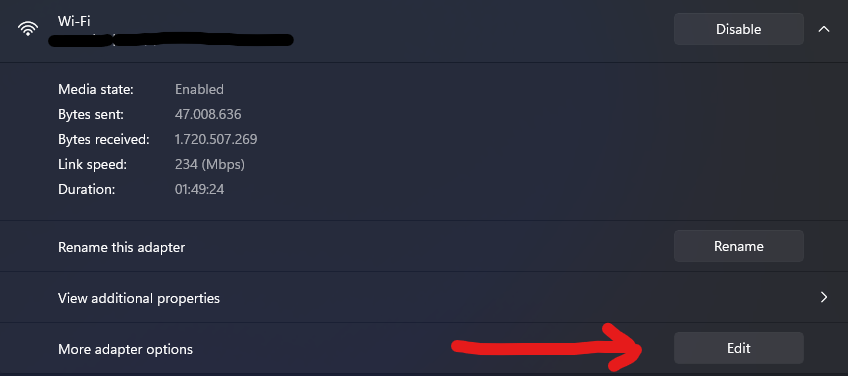
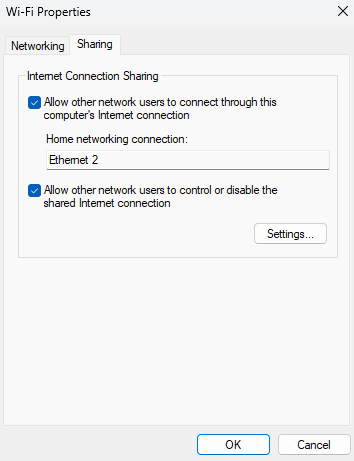
In the new menu click on "Sharing" and double click it. Enable internet sharing and choose your pwnagotchi(in my case "Ethernet 2").
Accept everything and go back to the "Advanced network settings".
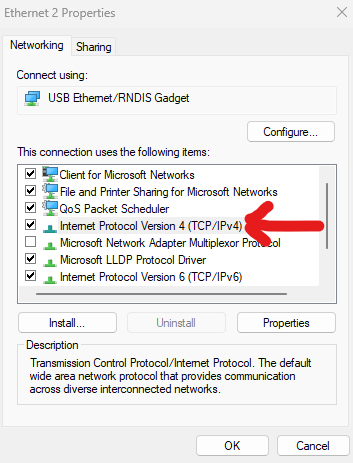
Expand the menu of your Pi and click on "Edit".
In the new menu search for "Internet Protocol Version 4(TCP/IPv4)" and double click it:
Now enter following data in the brackets:
Ip address: "10.0.0.1"
Subnet mask: "255.255.255.0"
Preferred DNS server: "1.1.1.1"
Alternate DNS server: "8.8.8.8"
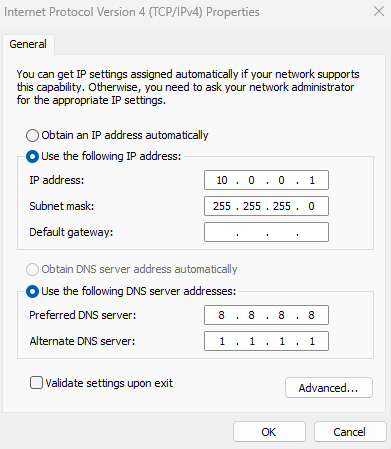
Accept everything, and now we can SSH into our Pi.
Important!!!
If you reconnect your Pi to your PC,
you will have to disable network sharing and enable it again and
you have to repeat the above shown steps.
SSH into the Pi and change the password
Open up "CMD" by searching for "Command Prompt" in the taskbar:
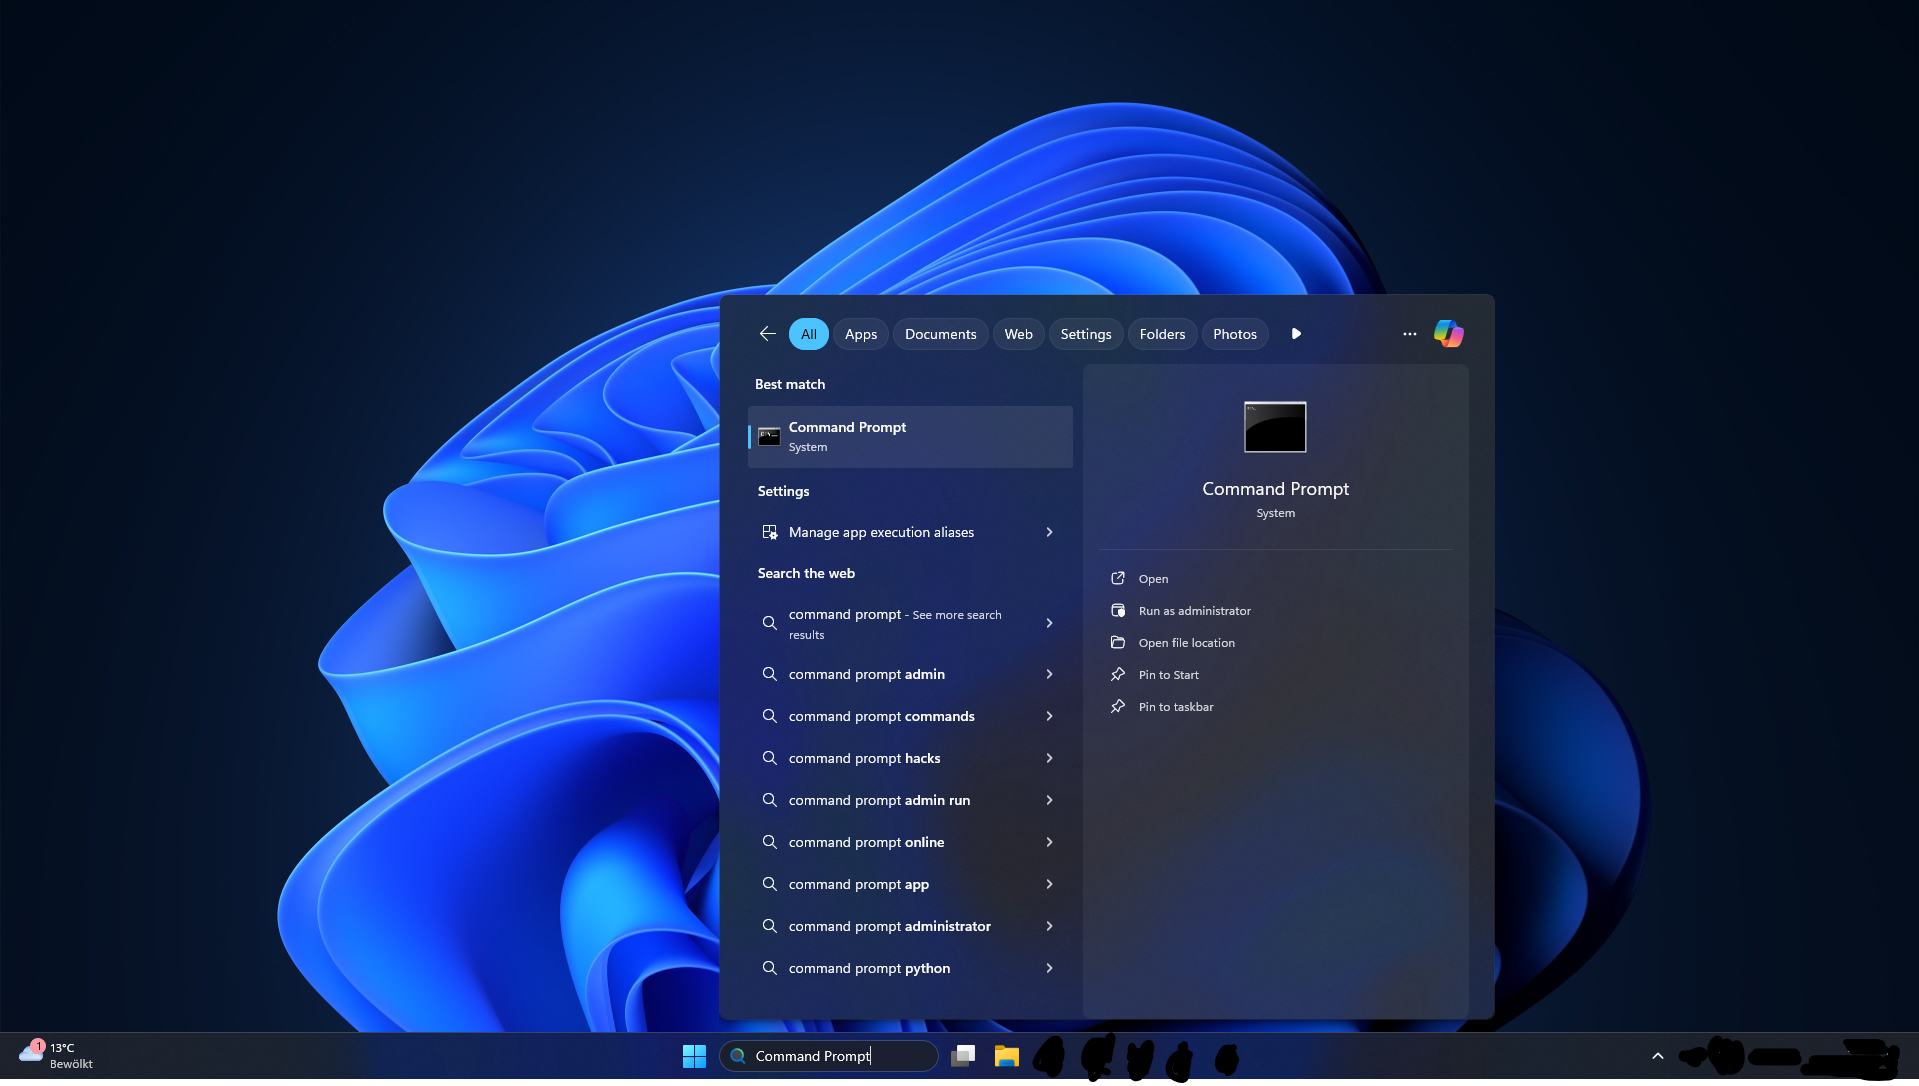
Open it up.
Type "ssh pi@10.0.0.2" and click enter.
The password is "raspberry".
Now we have to change the password of our pi.
Type "passwd" and click enter to change the password for SSH excise.
Basic Configuration
Run this command "sudo pwnagotchi --wizard" to setup a basic config-file.
You will setup following things with this command:
- the name for your pwnagotchi
- whitelist of networks(networks to ignore(like your home network))
- you can find the information needed for this in the properties of your home network.
- Enable or disable BT-tethering(disable it for now I will cover this later on)
- Enable the display and choose the color of it
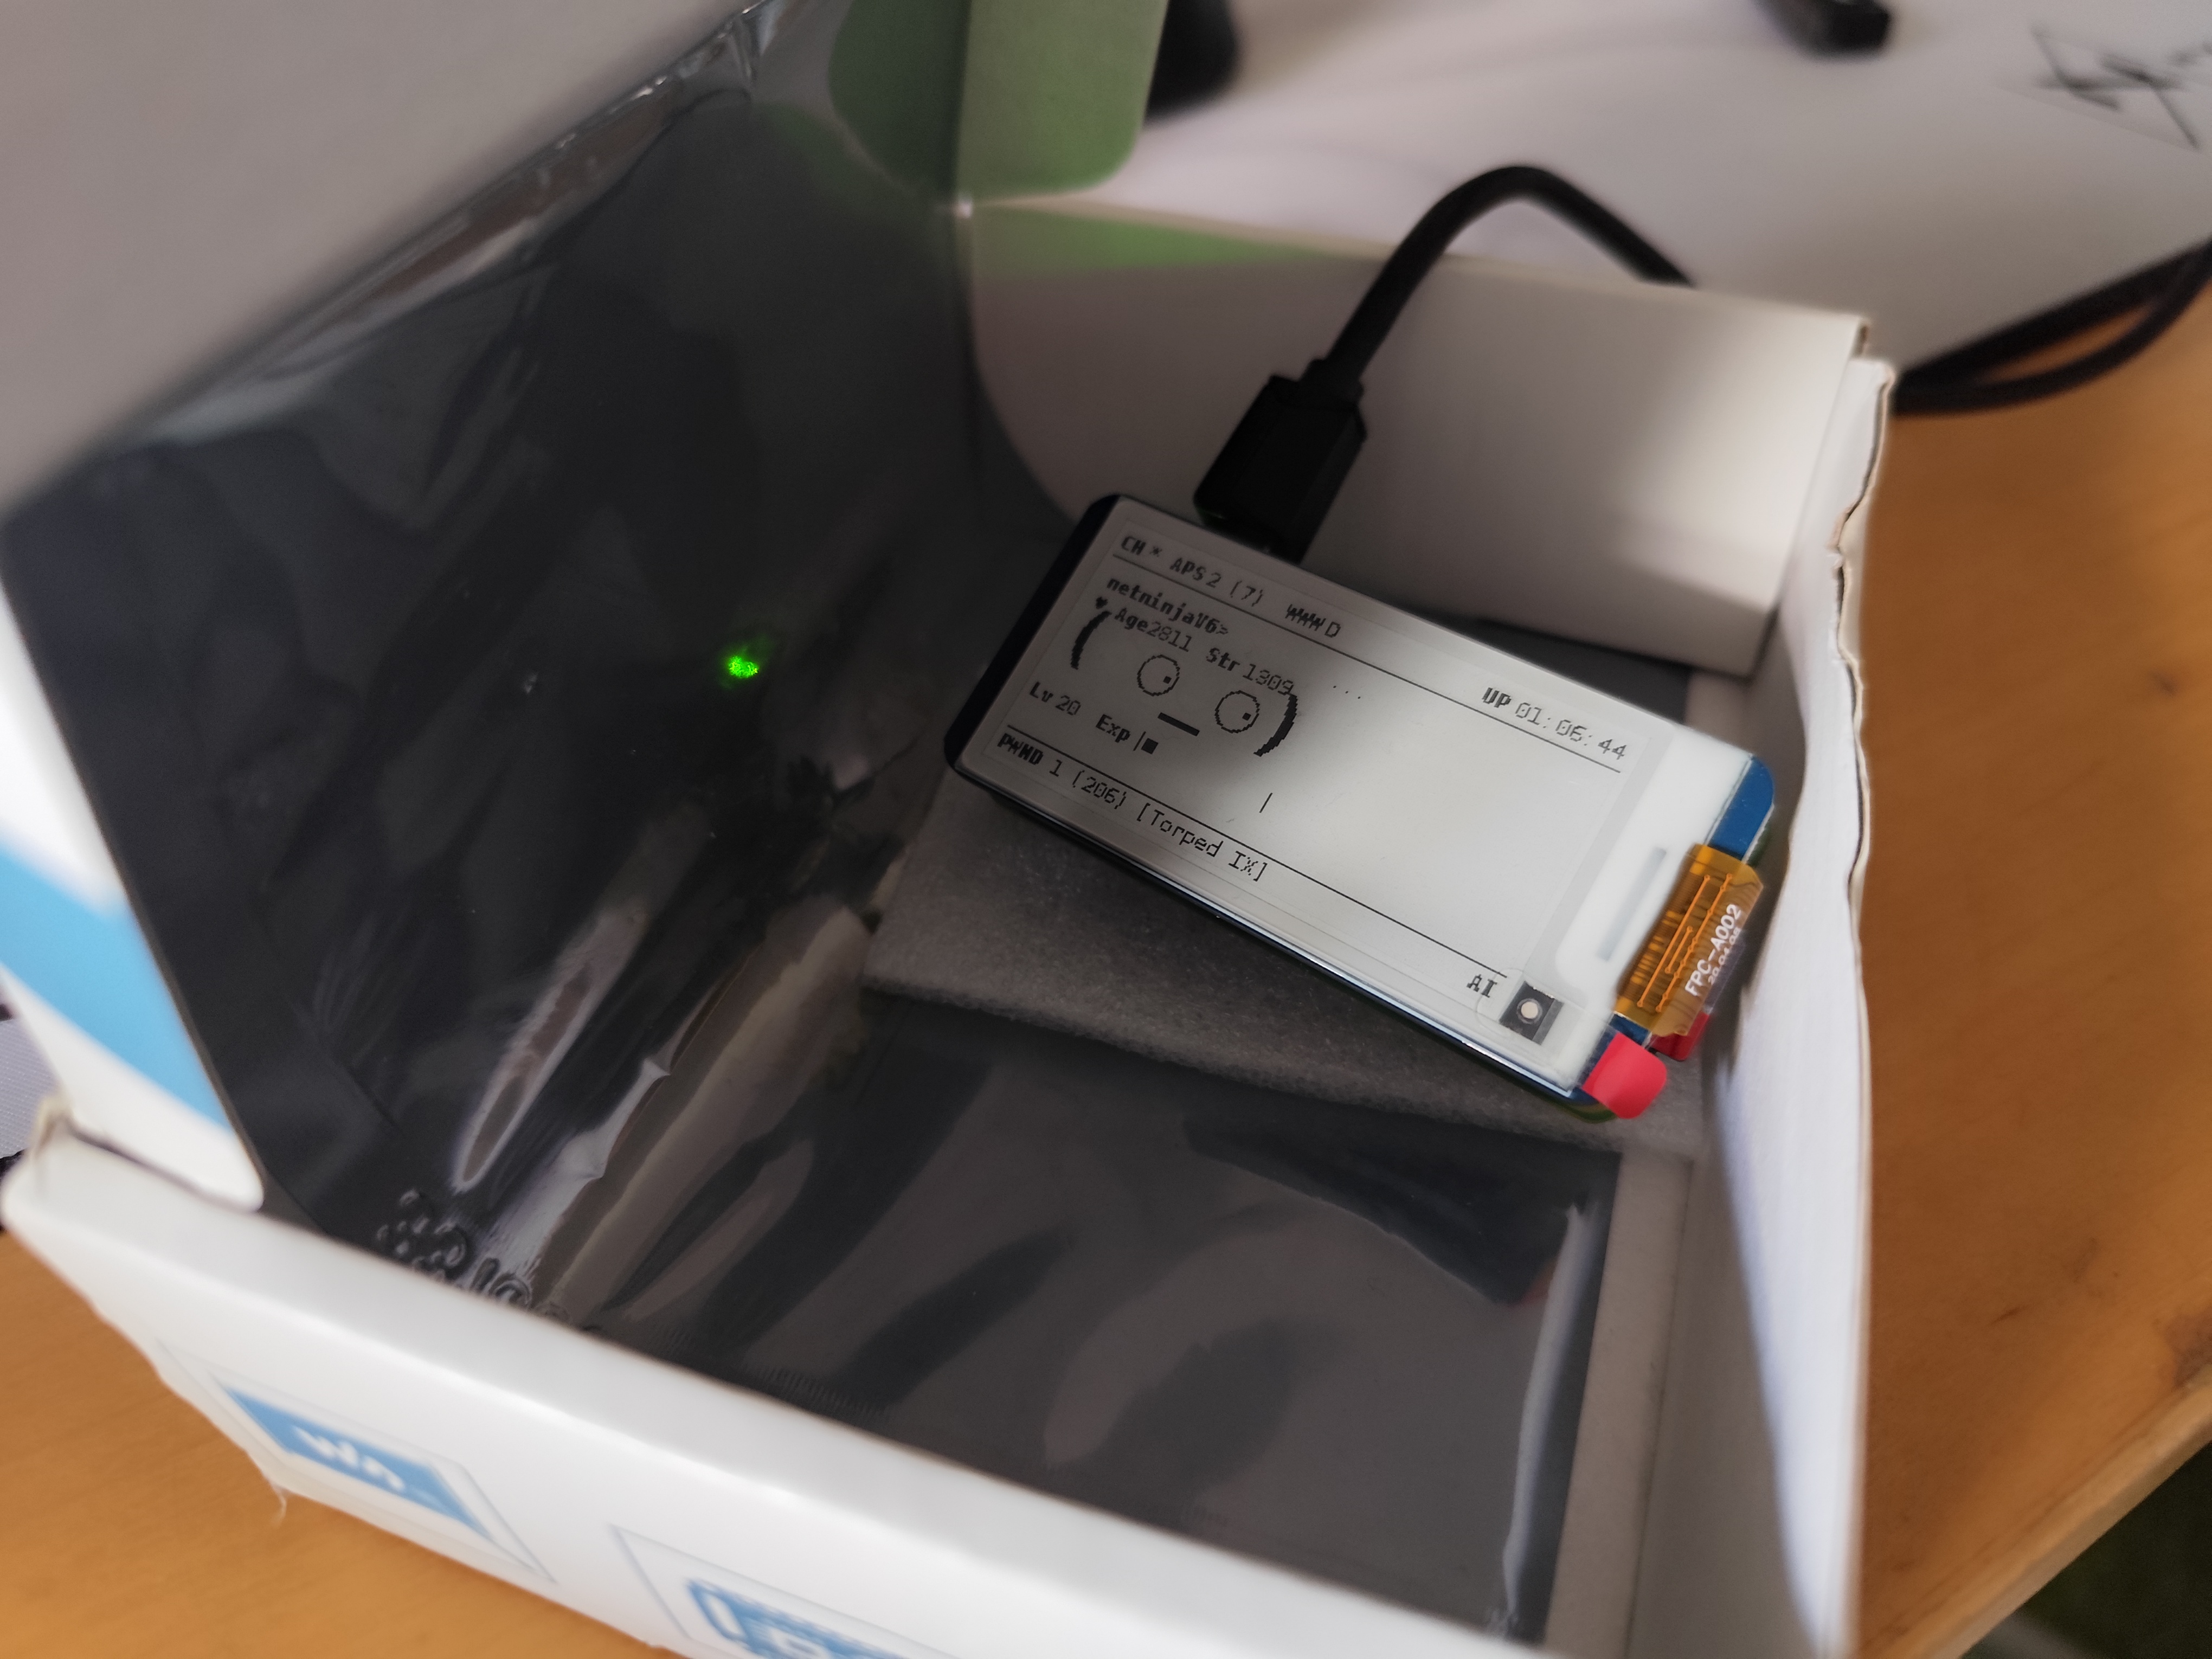
The display of your Pi should display something after a short while.
Edit Config-File
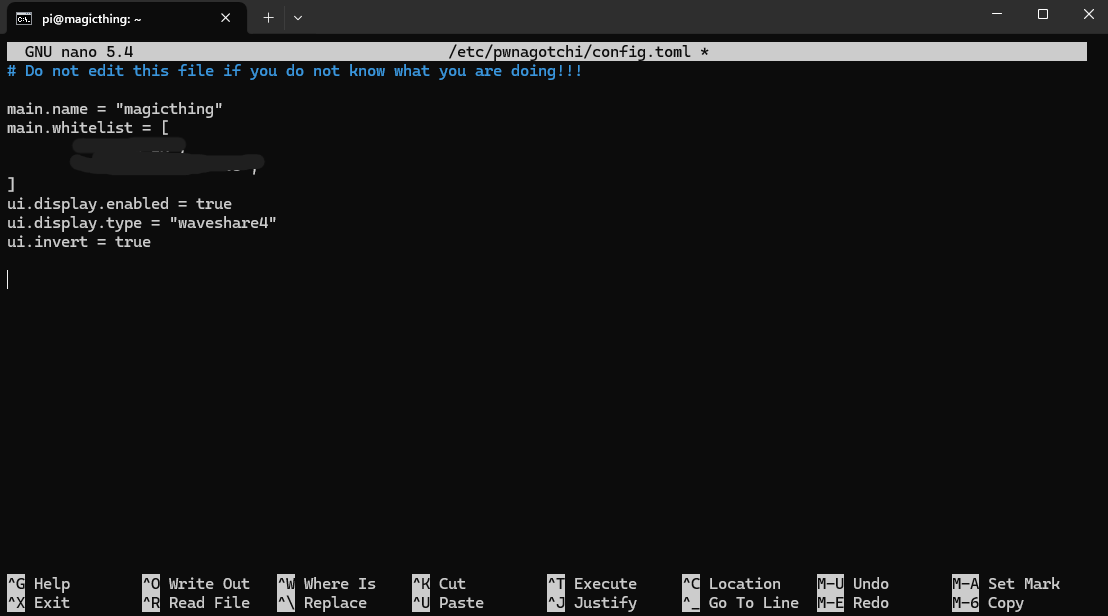
Run the this command: "sudo nano /etc/pwnagotchi/config.toml".
A file editor should open and it should look like this:
main.plugins.auto-update.enabled = true
main.plugins.auto-update.install = true
main.plugins.auto-update.interval = 1
bettercap.handshakes = "/handshakes"
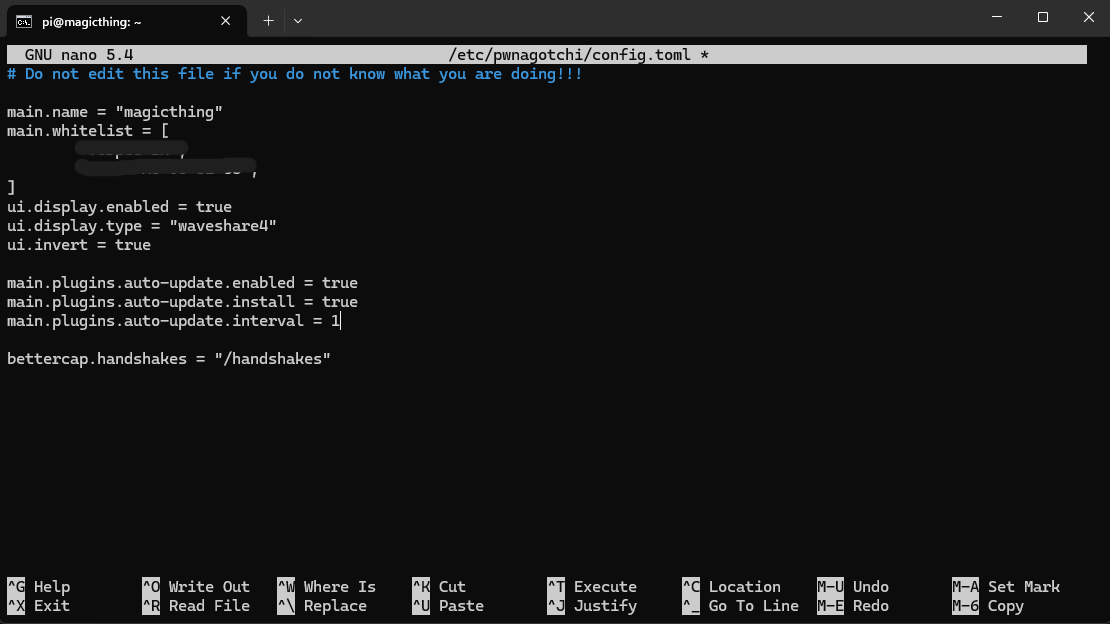
Now click CTRL + S to save the changes and then click CTRL + X to exit the editor.
These changes enable auto update and change the location of the captures handshakes to access them easily.
Restart your pwnagotchi by running this command: pwnkill
Your Pi is now ready for use just plug a power bank into the power-port and run around with it.
(Only use on networks you are allowed to)